Mastering the Art Of Taking Screenshots In Windows 7 Laptop
Screenshots are powerful visual aids that help you communicate effectively. On a Windows 7 laptop, capturing screenshots might seem complex, but it’s quite simple when you know the right techniques. Whether you want to save an error message, create a tutorial, or capture an interesting moment, this guide will walk you through the process. Let’s delve into the world of screenshot-taking on Windows 7 laptops.
Built-in Snipping Tool
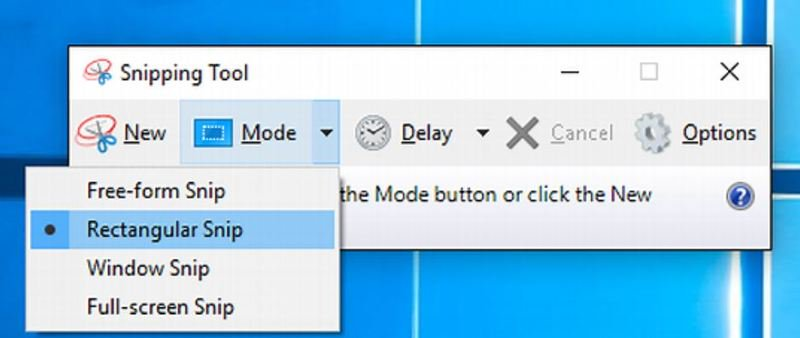
One of the easiest ways to take screenshots is using the built-in Snipping Tool. This tool allows you to capture a portion of the screen, a specific window, or the entire screen. To access it, open the Start menu, type “Snipping Tool,” and click on the result.
Using Keyboard Shortcuts
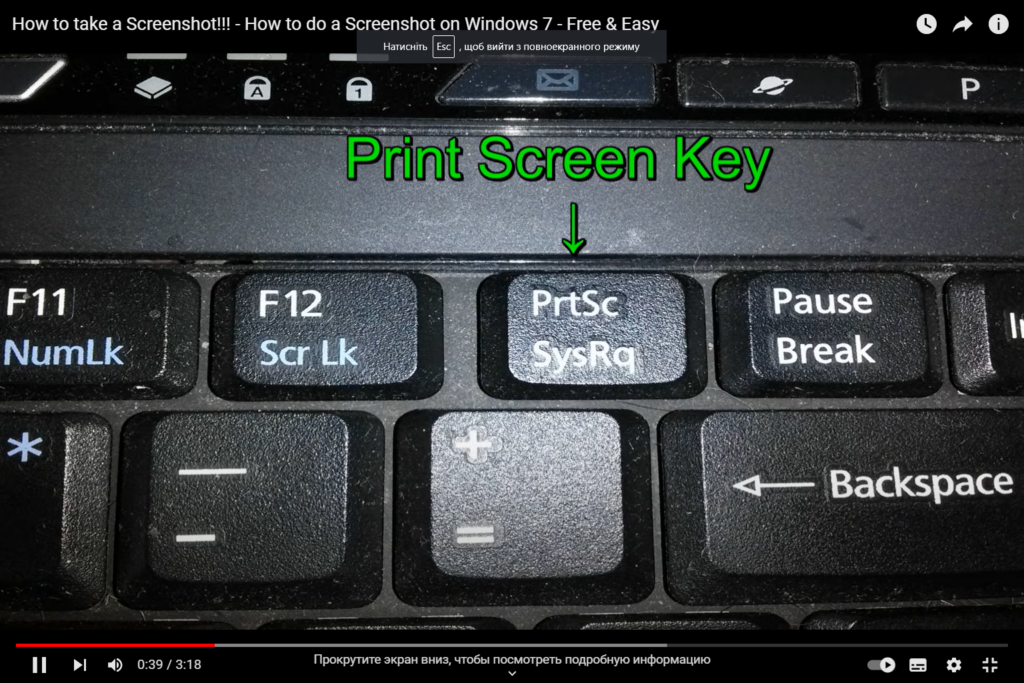
Keyboard shortcuts provide a quick and efficient way to capture screenshots. The most common shortcut is PrtScn or Print Screen. This captures the entire screen. For more control, use Alt + PrtScn to capture only the active window.
Snip & Sketch Tool
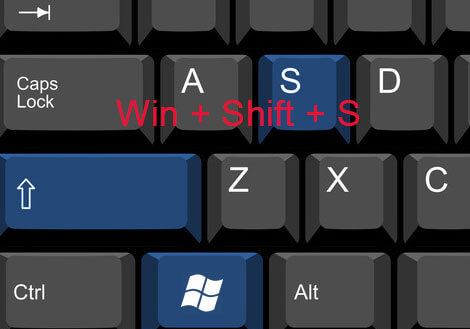
Windows 7 introduced the Snip & Sketch tool, enhancing screenshot capabilities. Press Windows + Shift + S to open the tool and select the area you want to capture. The screenshot will be copied to your clipboard, allowing easy pasting into other applications.
Saving and Editing Screenshots
After capturing a screenshot, it’s important to save and edit it. You can use Paint, which comes pre-installed, for basic editing. Alternatively, install a more advanced image editing software for greater flexibility.
Comparing Different Methods
| Method | Pros | Cons |
|---|---|---|
| Snipping Tool | Precise captures, built-in | Limited editing options |
| Keyboard Shortcuts | Quick and easy | Limited to full or active window |
| Snip & Sketch | Versatile, easy sharing | Additional tool opening step |
| Print Screen | Simple, no additional tools required | Limited to full screen or active window |
Tips for Perfect Screenshots
- Use High Resolution: Higher resolution screenshots ensure clarity;
- Clean Your Screen: Dust and smudges can affect image quality;
- Consider Composition: Arrange elements neatly before capturing;
- Utilize Editing: Enhance screenshots with annotations if needed.
Common Issues and Solutions
- Blank Screenshots: Ensure the screen isn’t locked or dimmed;
- Clipboard Issues: Restart the PC to reset clipboard functionality;
- Wrong Area Captured: Double-check before capturing.
Capturing Screenshots of Specific Applications
Sometimes, you may want to capture a screenshot of a specific application’s window rather than the entire screen. This can be particularly useful when you want to highlight a specific feature or error message within an application. To achieve this, follow these steps:
- Activate the Application: Open the application whose window you want to capture;
- Click on the Window: Make sure the desired window is in focus and click on it to ensure it’s the active window;
- Use Alt + PrtScn: Press the Alt key and then the PrtScn key. This captures only the active window and copies it to the clipboard;
- Paste the Screenshot: Open an image editing program like Paint, Photoshop, or even a document editor like Microsoft Word. Use Ctrl + V to paste the screenshot.
Taking Screenshots of Drop-down Menus
Capturing drop-down menus in a screenshot can be challenging, but it’s possible with the right technique. Follow these steps to achieve this:
- Prepare the Menu: Open the drop-down menu you want to capture;
- Press PrtScn: Press the PrtScn key to capture the entire screen, including the open menu;
- Crop the Screenshot: Open an image editing program and paste the screenshot (Ctrl + V). Use the cropping tool to select only the drop-down menu portion and save the image.
Using Third-Party Screenshot Tools
While Windows 7 offers built-in screenshot tools, you might find third-party software more versatile and feature-rich for advanced needs. Some popular third-party tools include:
- Greenshot: Offers advanced annotation and editing options, along with customizable keyboard shortcuts;
- Lightshot: Provides easy selection of screen areas and quick sharing options;
- Snagit: Offers a wide range of editing tools and the ability to capture scrolling web pages.
Organizing and Storing Screenshots
As you capture more and more screenshots, it’s essential to have a system in place for organizing and storing them efficiently. Here’s how you can manage your screenshot collection:
- Create Folders: Set up specific folders on your computer to categorize your screenshots. Create folders for work-related captures, personal references, tutorials, and more;
- Use Descriptive Names: When saving screenshots, give them meaningful names that reflect their content. This will make it easier to locate them later;
- Date and Time Stamps: Consider including the date and time in the file name to help track when the screenshot was taken;
- Cloud Storage: If you’re concerned about storage space on your laptop, consider using cloud storage services like Google Drive, Dropbox, or OneDrive to save your screenshots.
Editing and Enhancing Screenshots
While capturing screenshots is the first step, editing and enhancing them can make your visuals more informative and engaging. Here are some basic editing tips to elevate your screenshots:
- Annotations and Markups: Use the built-in tools in software like Snipping Tool or Snip & Sketch to add arrows, text boxes, and highlights to emphasize key points;
- Color Adjustments: Adjust brightness, contrast, and color saturation to enhance visibility and make your screenshots more appealing;
- Crop and Resize: Remove unnecessary elements by cropping the screenshot. Also, resize images to fit different platforms without compromising quality;
- Blur Sensitive Information: If your screenshot contains sensitive data, use the blur tool to hide it while still conveying the necessary information.
Conclusion
Congratulations! You’re now equipped with various methods to take screenshots on your Windows 7 laptop. Whether it’s a tutorial, a memorable chat, or a creative project, you can now capture and share moments seamlessly.